|
||||
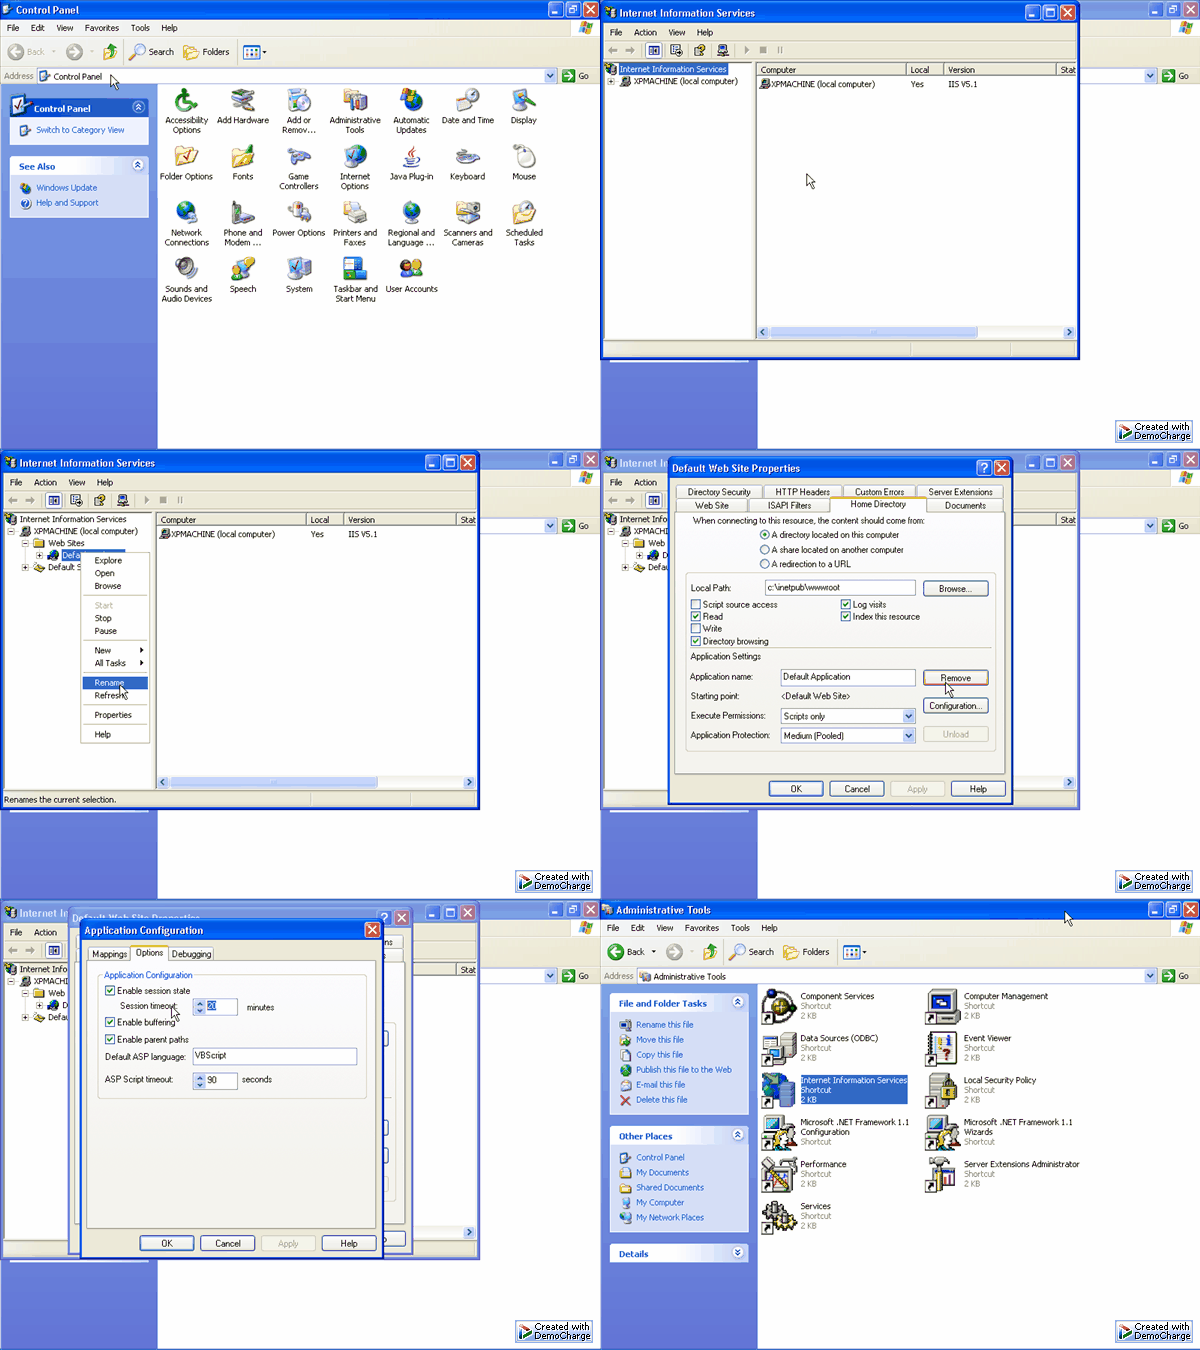
| Follow the steps below to change the default time session timeout in IIS. 1. Start Internet Information Services (IIS) administration tool (snap-in) from the Control Panel. 2. Navigate to the "Default Web Site" node, right click on it and then select "Properties". 3. In the 'Directory' tab click "Create" button, then click "OK". 4. Click on the "Home Directory" tab, then "Configuration". 5. Click on the "Options" tab. 6. Increase the "Session timeout" value and click "OK" twice until you return to the IIS snap-in.  |
||||
Viewed 156678 times. Last updated: 9/21/2004 1:12:26 AM |